Thursday, November 24, 2016

Angular 2 - Time to jump in! (Firebase)

*** This blog was written with Angular2 RC-3, I will be updating to the latest release shortly.  Thanks! ***

From my previous posts we got the Splat Shot score keeping UI components created with just some basic static text.  This post will concentrate on setting up and storing data in Google's latest Firebase platform.  I stumbled upon Firebase a few years ago before they were acquired by Google. Back then the greatest selling point of Firebase is the ability to 'push' data changes from one client to another.  Let's say someone updates the score of a match, and another person is on the site reviewing the leaderboard, the score change will update the leaderboard automatically without the other using having to refresh.  At Google IO 2016, they announced a new and updated Firebase 'platform' and it is nothing short of awesome!  They still have the ability to push data changes to clients, but now they integrate other Google services like  authentication, manage and communicate with groups of customers they call 'audiences', ad management, analytics and much, much more.  This list of YouTube videos is a really great overview introducing all the capabilities of Firebase.

For the rest of this post, we are going to assume that you have created a Firebase account and started a new project.  In this example, I created a Firebase project called 'splatshot':


As noted in the screen shot above, database rules are not set, meaning anyone can update data.  Since this is just a test application I am not going to get into database rules, but there is a lot of great information on the Firebase site regarding security rules.  In order to use Firebase from our application, we are going to use the new AngularFire2 library.  Follow these instructions (starting at step 2) to install Firebase in the Splat Shot application running the commands from your root application directory.  From the install instructions we will cover the injection and binding with the player list (do not need to do steps 8 - 10).  Once complete, also make sure to stop your current 'ng serve' process (if running) and run a full 'ng build'.  (If you are using Cloud 9, make sure to start your ng serve with a specific livereload port:  ng serve --port 8080 --live-reload-port 8082).

Once we have Firebase setup, lets start by creating an interface for a player.  This follows the pattern from Debroah Kurata's Movie Hunter example.  From the root project directory type the following command, the player/player means place this player interface in the +player directory (ie: ng g interface [directory]/[interfaceName]):

1
ng g interface player/player

The 'g' is shorthand for 'generate'.  You should see a new interface in the src/app/+player directory.  Add the following fields to the code:

1
2
3
4
5
6
export interface Player {
    firstName: string;
    lastName: string;
    email: string;
    phone: string;
}

Now that we have the player fields we want to track, next lets create a player service to interact with Firebase to read and write player information:

1
ng g service player/player


Angular 2 - Time to jump in! (Design)

*** This blog was written with Angular2 RC-3, I will be updating to the latest release shortly.  Thanks! ***

This is a series of posts on learning Angular2, you can review my Intro and Setup posts for more information.  Back to our Racquetball League score keeping application Splat-Shot, let's take a look at what we want the application to do and how it should be designed:

  • Need to keep track of a list of Players with:
    • Name
    • Phone
    • Email
  • Need to create a league which includes:
    • Players
    • Courts
    • Match Date / Time
    • Match Results
  • Need to create a Leader board summarizing match results
From a UI perspective we need:
  • Home screen
  • Menu Bar
    • Players
    • Matches
    • Leader board
  • Player
    • List
    • Edit
  • League
    • List
    • Update match results
  • Leader board - ordered list of players by match results
Other rules:
  • A match consists of 3 games
  • Each game is played to 15 points.
  • The winner of each game gets a match point.  If you win all three games, you get a bonus match point.
Let's start with the easy one first, creating a home screen, tool bar and slide navigation menu.  First we need to import the material design components:

  'core',
  'toolbar',
  'icon',
  'button',
  'sidenav',
  'list',
  'card',
  'input',
  'radio',
  'checkbox'

(follow instructions from setup, also make sure to follow the extra setup steps for MdIcon).  When creating a new application with AngularCLI, it creates a default component with your application name, in our example splat-shot.component.ts.  First, lets create the toolbar and menu bar:

src / splat-shot.component.ts

 1
 2
 3
 4
 5
 6
 7
 8
 9
10
11
12
13
14
15
16
17
18
19
20
21
22
23
24
25
26
27
28
29
30
31
32
33
34
35
36
37
38
39
40
41
42
43
44
45
import { Component } from '@angular/core';
import {MdToolbar} from '@angular2-material/toolbar';
import {MdButton} from '@angular2-material/button';
import {MD_SIDENAV_DIRECTIVES} from '@angular2-material/sidenav';
import {MD_LIST_DIRECTIVES} from '@angular2-material/list';
import {MD_CARD_DIRECTIVES} from '@angular2-material/card';
import {MdIcon, MdIconRegistry} from '@angular2-material/icon';

@Component({
  moduleId: module.id,
  selector: 'splat-shot-app',
  templateUrl: 'splat-shot.component.html',
  styleUrls: ['splat-shot.component.css'],
  directives: [
    MD_SIDENAV_DIRECTIVES,
    MD_LIST_DIRECTIVES,
    MdToolbar,
    MdIcon
  ],
  providers: [MdIconRegistry]
})
export class SplatShotAppComponent {
  
  title = 'splat-shot works!';
  
  views: Object[] = [
    {
      name: "Home",
      description: "Latest News in the League.",
      icon: "home"
    },
    {
      name: "Matches",
      description: "Show the upcoming matches.",
      icon: "perm_contact_calendar"
    },
    {
      name: "Players",
      description: "Show List of players.",
      icon: "people"
    }
  ];
  
  
}

In the code sample above, we import the material design components and setup our directives.  This menu bar design was taken from the PuppyLove example where the views is an object array that is then populated in the HTML file using an *ngFor Loop:

src \ splat-shot.component.html


 1
 2
 3
 4
 5
 6
 7
 8
 9
10
11
12
13
14
15
16
17
<md-sidenav-layout fullscreen>
  <md-sidenav #sidenav>
    <md-nav-list>
      <a md-list-item *ngFor="let view of views">
        <md-icon md-list-icon>{{view.icon}}</md-icon>
        <span md-line>{{view.name}}</span>
        <span md-line class="secondary">{{view.description}}</span>
      </a>
    </md-nav-list>
  </md-sidenav>
  <md-toolbar color="primary">
    <button md-icon-button (click)="sidenav.open()">
      <md-icon>menu</md-icon>
    </button>
    Splat Shot!
  </md-toolbar>
</md-sidenav-layout>

Your application should now look like this:


When you click the menu button, the array of views defined in your component should appear:

In my next post we will look at  creating the components behind the menu items and add routing.


Angular 2 - Time to jump in! (Intro)

*** This blog was written with Angular2 RC-3, I will be updating to the latest release shortly.  Thanks! ***

Introduction


I consider myself a MEAN Stack evangelist, I love being able to use JavaScript / JSON from database to browser, its just easy to ready, easy to debug and overall just brings the fun back to programming (coming from writing Java for 10+ years).  When I first saw Angular 1.X, I thought it was 'black magic', two-way data binding... amazing.  Using Angular Controllers, Services, Directives, along with Mongoose, express-restify-mongoose, and some really cool templates from Wrap Bootstrap (Inspinia), I created some great web applications for my customers.  Naturally I was very excited to hear about 'what's next', thinking "Oh 2.0 is going to be awesome, I'm a $scope / controller fiend" and then at ng-conf 2015, the news broke:  "Angular 2 is throwing out controllers and swapping in components and oh by the way, we partnered with Microsoft and we are writing it in Typescript."  Wait... WHAT????

Fast forward ng-conf 2016 and it appears the initial shock has subsided, Angular 2 RC1 has been released, it appears the clouds are parting and the sun is starting to shine.  I was unable to attend the 2016 ng-conference, but I watched every video on their YouTube channel.  After watching the presentation on Angular CLI, I saw the ability to create a new Angular2 application without having to worry about architecture, gulp or webpack, and I said... "It's time to jump in".  By the way, shout out to the folks over a Scotch.io, I love their write-ups and they have a great summary of ng-conf 2016.

I believe that the best way to learn anything new is to pick a problem and solve it.  I play in a local racquetball league and we keep score on a piece of paper taped to the wall.  I think its time to bring our league's score board into the 2000's with an Angular 2 app (all jokes of old guys with head bands and goggles aside ;) ).

Development Environment

Everyone has their favorite OS and IDE but it just boils down to what is the fanciest text editor that makes me the most productive.  A while back I stumbled on an article about someone using a Chromebook for development and was introduced to Cloud9.  At first I was skeptical, probably just NotePad++ in a browser window, but WOW was I surprised!  Cloud 9 has full command line access, the editor has type-ahead, formatting, easy to search and display files, split views and much more.  I'm just amazed at what can be done through a web browser, and using Cloud9, I don't have to worry about setting up CentOS in a VirtualBox, my IDE travels with me where ever I go, exactly where I left off.

Code Examples

I decided to call my racquetball scoreboard application Splat-Shot in reference to a type of shot in racquetball that creates a distinctive 'splat' sound when it hits the front wall.  So I have the problem I want to solve, but where should I start?  Well let's see what everyone else is doing and then pick the best practices that work best for me.  The speakers at the 2016 ng-conf were great, so I downloaded each of their code examples to my Cloud9 IDE.  Some of them are listed below:

Issue-Zero
Following the same thought process of 'finding a problem and solving it', the Angular team created Issue Zero to help triage the GitHub issues for Angular 2.  This is a really great example, it includes Firebase, Authentication, Observables, Angular Universal... and the list goes on.  While great code, I found trying to learn all of these new technologies at once was a bit overwhelming.

Puppy Love
This is a great example for the use of Angular2's version of Google's Material Design.  With Angular1 I am a huge Bootstrap fan and with the Inspinia template, I had all the UI components I needed to make great looking web applications.  There are other layout / UI component libraries for Angular2 including ng-bootstrap and Telerik Kendo UI, but I'm an Android nut and I love the look and feel of Material Design so I decided to stick with the Material Design team.

Tour of Heros
This is the 'official' Angular2 demo application from the tutorial on the Angular website.

Movie Hunter
My Splat-Shot application demonstration is the culmination of many hours of learning, destroying, and rebuilding the application, again learning what's out there and picking what works best for me.  It was not until I watched the presentation on Angular 2  Forms from Deborah Kurata that I finally said, "Yes, this is what I want my code to look like".  She also has several training videos on Plural Sight.


ng-book 2
I jumped in on the early-bird pricing for this book and was not disappointed.  This is a great summary of Angular2, the code samples are well thought out and easy to read.


Just one more quick reference to the guys at DevChat.tv, Adventures in Angular is a great podcast on everything Angular, they have excellent interviews with Angular team members, 'people in the know' and just all around 'good banter'.

With your IDE set and sample code downloaded, check out my next post getting the Splat-Shot application setup and start writing some code.


Tuesday, June 7, 2016

Angular 2 - Time to jump in! (Routing)

*** This blog was written with Angular2 RC-3, I will be updating to the latest release shortly.  Thanks! ***

In my previous posts we created the toolbar and menu bar for the Splat-Shot application.  Now we need to create the components behind the menu bar and setup some routing.  The first thing to do is create a new component, and the AngularCLI makes this really easy.  Because we also want our components to be routes, use the 'generate route' command.  Make sure you are in the root directory of your project folder /splat-shot and type:

1
ng generate route home

AngularCLI will create the TypeScript component, the HTML / CSS files along with a component test.  By default AngularCLI creates a 'lasy loaded' view designated by the '+home' directory name.  This is listed in the style guide for marking lazy loaded components.  Another interesting point is that you should not explicitly import lazy loaded components in their parent or sibling components, see style guide for more information.  Let's add some basic HTML and CSS:

src / app / +home / home.component.html

1
2
3
4
5
<div class="welcome">
    <h4>Welcome to:</h4>
    <h1>Splat Shot</h1>
    <h4>Racquetball League Scoreboard</h4>
</div>

src / app / +home / home.component.css

1
2
3
.welcome {
    text-align: center;
}

Save both the files and live-reload should kick off and ... nothing happens.  That is because we have to tell our main component to load the home component as the default route.

src / app / splat-shot.component.ts

...
import { Routes, Router, ROUTER_DIRECTIVES, ROUTER_PROVIDERS} from '@angular/router';
...
  providers: [
    ROUTER_PROVIDERS,
    MdIconRegistry
  ]
...
@Routes([
    { path: '/', component: HomeComponent },
    { path: '/home', component: HomeComponent}
])
...
  constructor(private router: Router) {}
 ngOnInit() {
 }
...

Your application should now show the home screen:


I had some help from another really great routing example from Juan Suarez. Now let's add the player list and leaderboard components:


1
2
ng generate route player
ng generate route leaderboard

With the other two routes complete, now lets wire up the menu bar.  The AngularCLI already injected the routes, the only thing we have to update is our menu object array:

src / app / splat-shot.component.ts


 1
 2
 3
 4
 5
 6
 7
 8
 9
10
11
12
13
14
15
16
17
18
19
20
21
22
...
views: Object[] = [
    {
      name: "Home",
      description: "Latest News in the League.",
      icon: "home",
      route: '/home'
    },
    {
      name: "Matches",
      description: "Show the upcoming matches.",
      icon: "perm_contact_calendar",
      route: '/leaderboard'
    },
    {
      name: "Players",
      description: "Show List of players.",
      icon: "people",
      route: '/player'
    }
  ];
...

Next, we update our html link to include the routerLink and a click operation to close the menu when a user selects the item:

src / app / splat-shot.component.html


 1
 2
 3
 4
 5
 6
 7
 8
 9
10
11
12
13
...
<md-sidenav #sidenav>
    <md-nav-list>
      <a md-list-item *ngFor="let view of views" 
        [routerLink]="[ view.route ]"
        (click)="sidenav.close()">
        <md-icon md-list-icon>{{view.icon}}</md-icon>
        <span md-line>{{view.name}}</span>
        <span md-line class="secondary">{{view.description}}</span>
      </a>
    </md-nav-list>
  </md-sidenav>
...

You should now be able to select a menu item and have it switch between the different components:


In my next post, we will be looking at adding more functionality to each component than just static text.


Friday, June 3, 2016

Angular 2 - Time to jump in! (Setup)

This post describes setting up my Angular2 demonstration application called 'Splat-Shot'.  I will be using the Cloud9 IDE and code from several other examples, see my Intro post for more information.

Setting up Splat-Shot

Once you have your new Cloud9 Desktop started for NodeJS development (preloads NodeJS and NPM), open a command prompt and type the following (Directions from Angular CLI):


1
2
3
4
npm install -g angular-cli
ng new splat-shot
cd splat-shot
ng serve --port 8080 --live-reload-port 8082


If you are walking through this demo outside of Cloud9, you can just type "ng serve", but Cloud9 only has ports 8080-8082 open, so assign live-reload to port 8082 and changes update as soon as you click save.  (Thanks ng cli team for making the ports assignable, you guys are genius!) In the Cloud9 menu bar at the top click "Preview > Preview Running Application" and a new window will appear with a starting message:

To verify that live-reload is working, navigate to the following file and add the code:

src \ app \ splat-shot.component.html


1
<h2>Live Reload Works!</h2>


The preview should reload automatically and display:


Layout and UI Components

Once we have splat-shot running, time to install Material Design, please follow the instructions from the Material Design GitHub Website.  Once you have made the changes from the installation instructions, stop the current ng serve process and restart, (make sure to set the livereload port if in Cloud 9):

ng serve --port 8080 --live-reload-port 8082

To make sure everything is working, open the following file and add make the changes below:

src \ app \ splat-shot.component.ts


 1
 2
 3
 4
 5
 6
 7
 8
 9
10
11
12
13
14
import { Component } from '@angular/core';
import { MD_CARD_DIRECTIVES } from '@angular2-material/card';
import { MD_BUTTON_DIRECTIVES } from '@angular2-material/button';

@Component({
  moduleId: module.id,
  selector: 'splat-shot-app',
  templateUrl: 'splat-shot.component.html',
  styleUrls: ['splat-shot.component.css'],
  directives: [MD_CARD_DIRECTIVES, MD_BUTTON_DIRECTIVES]
})
export class SplatShotAppComponent {
  title = 'splat-shot works!';
}

src \ app \ splat-shot.component.html


1
2
3
4
5
6
7
8
9
<md-card>
    <md-card-title>{{title}}</md-card-title>
    <md-card-content>
        Racquetball Score Keeping System
    </md-card-content>
    <md-card-actions align="end">
      <button md-raised-button color="accent">Splat!</button>
    </md-card-actions>
</md-card>

You should now have a Material Design card with a button:


Keep in mind we just imported only the Material Design core, cards, and button.  If you want to use any other components from Material Design, you'll have to import them as well.  For example, let's say you want to use a progress circle, first install the component using npm:


npm install --save @angular2-material/progress-circle
 
Update your configuration and html:
 
src \ system-config.ts


 1
 2
 3
 4
 5
 6
 7
 8
 9
10
...

const materialPkgs:string[] = [ 
  'core', 
  'button', 
  'card', 
  'progress-circle'
];

...

src \ app \ splat-shot.component.ts


 1
 2
 3
 4
 5
 6
 7
 8
 9
10
11
12
13
14
15
import { Component } from '@angular/core';
import { MD_CARD_DIRECTIVES } from '@angular2-material/card';
import { MD_BUTTON_DIRECTIVES } from '@angular2-material/button';
import { MdProgressCircle } from '@angular2-material/progress-circle';

@Component({
  moduleId: module.id,
  selector: 'splat-shot-app',
  templateUrl: 'splat-shot.component.html',
  styleUrls: ['splat-shot.component.css'],
  directives: [MD_CARD_DIRECTIVES, MD_BUTTON_DIRECTIVES, MdProgressCircle]
})
export class SplatShotAppComponent {
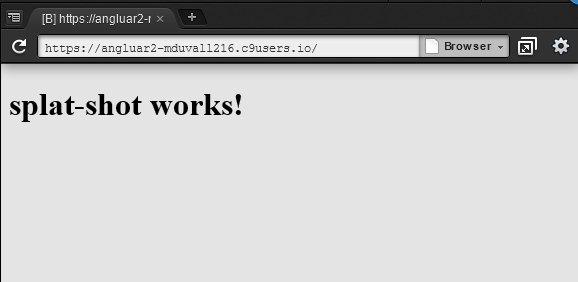
  title = 'splat-shot works!';
}


src \ app \ splat-shot.component.html


 1
 2
 3
 4
 5
 6
 7
 8
 9
10
<md-card>
    <md-card-title>{{title}}</md-card-title>
    <md-card-content>
        Racquetball Score Keeping System
    </md-card-content>
    <md-card-actions align="end">
      <md-progress-circle mode="indeterminate"></md-progress-circle>
      <button md-raised-button color="accent">Splat!</button>
    </md-card-actions>
</md-card>

You should now have a progress circle spinning next to your button:


NOTE: This process is important, since TypeScript needs to be compiled to JavaScript, you need to tell the AngularCLI the new packages to build and include in your index.html.

Now that we have the 'shell' of the Splat-Shot application up and running with AngularCLI and some Material Design components installed, time to take a break and design the components of the application and their functions.  Check out my next post on design.

Sunday, May 29, 2016

Dear Google, please increase your Drive space...

Dear Google,

I'm a huge Google/Android nut, I use calendar/mail/drive to pretty much run my life.  I currently pay $2 a month for 100GB of drive storage which is not enough to store everything I have.  The next plan is 1TB for $10 a month which is way too much for home photos / videos.  If you could create a 500GB plan for $3-5 a month, that would be more reasonable.The other problem I see is that your competition is closing in.  

While I use Google for everything, I buy everything from Amazon.  You are probably aware they are throwing everything but the 'kitchen sink' in with a prime membership.  So for $99 a year ($8.25 a month) I get:

  • Prime Movie / Streaming  Included   vs  Google YouTube Red $10 a month
  • Prime Music   vs  Google Music $10 a month
  • Prime Photo Unlimited No Compression   vs  Google Photo Unlimited ('changes original resolution, I don't want that')
  • Prime Books 800K Included   vs  Google Books purchase eBook separately
  • Free 2 Day shipping   vs   (When Google buys Walmart???)
  • Prime Cloud Storage Unlimited ($60 a year)   vs  Google Drive ($10 a month for only 1 TB)

Here is my point, I love Google services, I use them everyday, but from the comparison above, Amazon is providing a great deal.  If I spent $160 a year ($13 am month) with Amazon, I get movies, music, uncompressed photos, unlimited cloud drive, eBooks and free 2 day shipping.  To get something comparable to Google, I would need to spend $360 a year ($30 a month), and that's only for 1TB of drive including YouTube Red and Music. Google, I have posted this request before, I have chatted with service reps and asked repeatedly for increased drive space on your plans.  You leave me with no choice, but if you do not give us the option for larger cheaper drive storage, I have no choice but to take my business to Amazon services.  Thank you for your time.

Matt

Sunday, May 15, 2016

Finally, using a 3D printer for something other than Army Men


The explosion of 3D printers is simply amazing.  From the humble starts of MakerBot to the cool new high resolution resin printers from Formlabs, 3D printing is certainly changing the way we design and manufacture new products.  But for the home hobbiest, after you print a few Army men and a key chain here and there, what do you do?  Well I finally came across a problem that 3D printing was the perfect solution.

From my previous post, I am a huge home theater nut and you can't curl up on the couch for a movie without popcorn.  The 'gold standard' of popcorn machines is Gold Medal.  The popcorn popper I purchased from Gold Metal is built like a tank, except for one slight problem, the plastic hinge on the front plexiglass doors broke after many years of use.


The hinge is supposed to have a plastic 'spike' sticking straight up that the door hinge below  slips over.


Here is what the door should like:


The sales team over at Gold Medal were very helpful, but unfortunately since we have an older model, they no longer make the hinge piece.  They did however say a replacement hinge from another model may fit, but with shipping would be around $40.  That's when a lightbulb went off, why don't I just 'print' a new hinge?

Our local library in Carroll County Maryland has a new 3D printing lab that has great prices on printed items.  They recommend using a web based design tool from Tinkercad.  As a web developer I'm amazed at what can be done in a web browser today and this software looks great and is easy to use.  After using just a basic ruler with millimeter scale, I recreated the broken hinge piece:


I downloaded the 3D file from Tinkercad to a USB drive and drove over to our local library.  They have a Lulzbot printer that uses basic PVC stock, but due to the wear and tear of the hinge I opted for stronger ABS plastic which had to be sent to another library branch.  Within a about a week, the parts came back, below is a comparison of the broken hinges and the newly printed parts:


Straight off the printer they had a little support material, but it easily came off by hand and then cleaned up with a razor blade.


This is a shot of the attached hinge to the popcorn machine.  I was somewhat surprised (and proud) that the screw holes lined up perfectly the first time, no adjustments with a drill bit required.


After the hinges were installed, the moment of the truth, the door slipped right over the hinge pins, no problems.  So for $2.50 and a little time with Tinkercad I was able to 'machine' my own hinge replacement.  I have officially been bitten by the 3D printer bug, now I look around the house and say, new knobs on the stove, no problem ( although that might not pass the wife test ).

Special thanks to the people over at Gold Medal they were very responsive and tried their best to find the right replacement part.  Check out their website they have some really cool machines like this monster for movie theaters.  Also thanks to the staff at the Eldersburg and Westminster library branches in Carroll County Maryland, it is really great to see our library system providing this great service to the community.

Time to throw in my favorite movie of all time The Matrix and pop some corn!


Thursday, May 12, 2016

Get MEAN!


It's 1995 and I just finished college with an Accounting Degree working as a Junior Accountant at a healthcare company, then this 'thing' called the Internet hit the public scene.  Forget balance sheets, I want to be a web developer!  I started basic web development and later enrolled in a Masters Program at Stevenson University where I learned Object Oriented programming and Java.

I spent the next 15 years programming in Java, everything from Data Access Objects to Swing UIs.  Needless to say I had lost the edge in web development.  Then along comes a project where our customer says, "Here is my problem, I need a dashboard to aggregate large amounts of data and visualize it.  I don't care what you use, just make it fast and functional".  Fast and functional, well cross off Swing UI, what's the latest in web development?

That's when I GOT MEAN!  The MEAN Stack, or MongoDB, Express Web Framework, Angular JS, and Node JS.  What?  How can this JavaScript thing take on a big OO language like Java?  Well it does, and it is AWESOME.  Take it from an old Java developer, I never want to write a line of pure Java again, MEAN Stack is extremely fast, easy to setup, and couple that with cloud services like OpenShift, I can prototype our solutions and iterate with our customers much faster.

I plan to detail in this blog my transformation from Accountant, to Java Developer, to MEAN Stack Evangelist!  Stay tuned for more information.