Tuesday, June 7, 2016

Angular 2 - Time to jump in! (Routing)

*** This blog was written with Angular2 RC-3, I will be updating to the latest release shortly.  Thanks! ***

In my previous posts we created the toolbar and menu bar for the Splat-Shot application.  Now we need to create the components behind the menu bar and setup some routing.  The first thing to do is create a new component, and the AngularCLI makes this really easy.  Because we also want our components to be routes, use the 'generate route' command.  Make sure you are in the root directory of your project folder /splat-shot and type:

1
ng generate route home

AngularCLI will create the TypeScript component, the HTML / CSS files along with a component test.  By default AngularCLI creates a 'lasy loaded' view designated by the '+home' directory name.  This is listed in the style guide for marking lazy loaded components.  Another interesting point is that you should not explicitly import lazy loaded components in their parent or sibling components, see style guide for more information.  Let's add some basic HTML and CSS:

src / app / +home / home.component.html

1
2
3
4
5
<div class="welcome">
    <h4>Welcome to:</h4>
    <h1>Splat Shot</h1>
    <h4>Racquetball League Scoreboard</h4>
</div>

src / app / +home / home.component.css

1
2
3
.welcome {
    text-align: center;
}

Save both the files and live-reload should kick off and ... nothing happens.  That is because we have to tell our main component to load the home component as the default route.

src / app / splat-shot.component.ts

...
import { Routes, Router, ROUTER_DIRECTIVES, ROUTER_PROVIDERS} from '@angular/router';
...
  providers: [
    ROUTER_PROVIDERS,
    MdIconRegistry
  ]
...
@Routes([
    { path: '/', component: HomeComponent },
    { path: '/home', component: HomeComponent}
])
...
  constructor(private router: Router) {}
 ngOnInit() {
 }
...

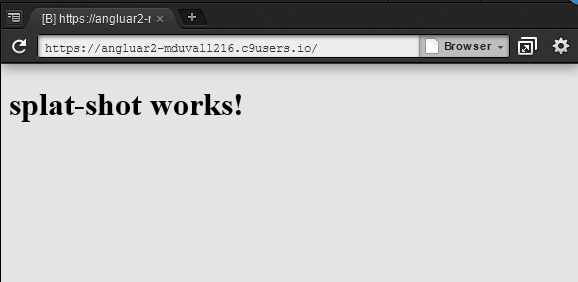
Your application should now show the home screen:


I had some help from another really great routing example from Juan Suarez. Now let's add the player list and leaderboard components:


1
2
ng generate route player
ng generate route leaderboard

With the other two routes complete, now lets wire up the menu bar.  The AngularCLI already injected the routes, the only thing we have to update is our menu object array:

src / app / splat-shot.component.ts


 1
 2
 3
 4
 5
 6
 7
 8
 9
10
11
12
13
14
15
16
17
18
19
20
21
22
...
views: Object[] = [
    {
      name: "Home",
      description: "Latest News in the League.",
      icon: "home",
      route: '/home'
    },
    {
      name: "Matches",
      description: "Show the upcoming matches.",
      icon: "perm_contact_calendar",
      route: '/leaderboard'
    },
    {
      name: "Players",
      description: "Show List of players.",
      icon: "people",
      route: '/player'
    }
  ];
...

Next, we update our html link to include the routerLink and a click operation to close the menu when a user selects the item:

src / app / splat-shot.component.html


 1
 2
 3
 4
 5
 6
 7
 8
 9
10
11
12
13
...
<md-sidenav #sidenav>
    <md-nav-list>
      <a md-list-item *ngFor="let view of views" 
        [routerLink]="[ view.route ]"
        (click)="sidenav.close()">
        <md-icon md-list-icon>{{view.icon}}</md-icon>
        <span md-line>{{view.name}}</span>
        <span md-line class="secondary">{{view.description}}</span>
      </a>
    </md-nav-list>
  </md-sidenav>
...

You should now be able to select a menu item and have it switch between the different components:


In my next post, we will be looking at adding more functionality to each component than just static text.


Friday, June 3, 2016

Angular 2 - Time to jump in! (Setup)

This post describes setting up my Angular2 demonstration application called 'Splat-Shot'.  I will be using the Cloud9 IDE and code from several other examples, see my Intro post for more information.

Setting up Splat-Shot

Once you have your new Cloud9 Desktop started for NodeJS development (preloads NodeJS and NPM), open a command prompt and type the following (Directions from Angular CLI):


1
2
3
4
npm install -g angular-cli
ng new splat-shot
cd splat-shot
ng serve --port 8080 --live-reload-port 8082


If you are walking through this demo outside of Cloud9, you can just type "ng serve", but Cloud9 only has ports 8080-8082 open, so assign live-reload to port 8082 and changes update as soon as you click save.  (Thanks ng cli team for making the ports assignable, you guys are genius!) In the Cloud9 menu bar at the top click "Preview > Preview Running Application" and a new window will appear with a starting message:

To verify that live-reload is working, navigate to the following file and add the code:

src \ app \ splat-shot.component.html


1
<h2>Live Reload Works!</h2>


The preview should reload automatically and display:


Layout and UI Components

Once we have splat-shot running, time to install Material Design, please follow the instructions from the Material Design GitHub Website.  Once you have made the changes from the installation instructions, stop the current ng serve process and restart, (make sure to set the livereload port if in Cloud 9):

ng serve --port 8080 --live-reload-port 8082

To make sure everything is working, open the following file and add make the changes below:

src \ app \ splat-shot.component.ts


 1
 2
 3
 4
 5
 6
 7
 8
 9
10
11
12
13
14
import { Component } from '@angular/core';
import { MD_CARD_DIRECTIVES } from '@angular2-material/card';
import { MD_BUTTON_DIRECTIVES } from '@angular2-material/button';

@Component({
  moduleId: module.id,
  selector: 'splat-shot-app',
  templateUrl: 'splat-shot.component.html',
  styleUrls: ['splat-shot.component.css'],
  directives: [MD_CARD_DIRECTIVES, MD_BUTTON_DIRECTIVES]
})
export class SplatShotAppComponent {
  title = 'splat-shot works!';
}

src \ app \ splat-shot.component.html


1
2
3
4
5
6
7
8
9
<md-card>
    <md-card-title>{{title}}</md-card-title>
    <md-card-content>
        Racquetball Score Keeping System
    </md-card-content>
    <md-card-actions align="end">
      <button md-raised-button color="accent">Splat!</button>
    </md-card-actions>
</md-card>

You should now have a Material Design card with a button:


Keep in mind we just imported only the Material Design core, cards, and button.  If you want to use any other components from Material Design, you'll have to import them as well.  For example, let's say you want to use a progress circle, first install the component using npm:


npm install --save @angular2-material/progress-circle
 
Update your configuration and html:
 
src \ system-config.ts


 1
 2
 3
 4
 5
 6
 7
 8
 9
10
...

const materialPkgs:string[] = [ 
  'core', 
  'button', 
  'card', 
  'progress-circle'
];

...

src \ app \ splat-shot.component.ts


 1
 2
 3
 4
 5
 6
 7
 8
 9
10
11
12
13
14
15
import { Component } from '@angular/core';
import { MD_CARD_DIRECTIVES } from '@angular2-material/card';
import { MD_BUTTON_DIRECTIVES } from '@angular2-material/button';
import { MdProgressCircle } from '@angular2-material/progress-circle';

@Component({
  moduleId: module.id,
  selector: 'splat-shot-app',
  templateUrl: 'splat-shot.component.html',
  styleUrls: ['splat-shot.component.css'],
  directives: [MD_CARD_DIRECTIVES, MD_BUTTON_DIRECTIVES, MdProgressCircle]
})
export class SplatShotAppComponent {
  title = 'splat-shot works!';
}


src \ app \ splat-shot.component.html


 1
 2
 3
 4
 5
 6
 7
 8
 9
10
<md-card>
    <md-card-title>{{title}}</md-card-title>
    <md-card-content>
        Racquetball Score Keeping System
    </md-card-content>
    <md-card-actions align="end">
      <md-progress-circle mode="indeterminate"></md-progress-circle>
      <button md-raised-button color="accent">Splat!</button>
    </md-card-actions>
</md-card>

You should now have a progress circle spinning next to your button:


NOTE: This process is important, since TypeScript needs to be compiled to JavaScript, you need to tell the AngularCLI the new packages to build and include in your index.html.

Now that we have the 'shell' of the Splat-Shot application up and running with AngularCLI and some Material Design components installed, time to take a break and design the components of the application and their functions.  Check out my next post on design.